Yes! The tutorial for the cute crackers!
Actually, it’s a pictorial tutorial with added comments! Lol. I will have the description or instructions above the picture.
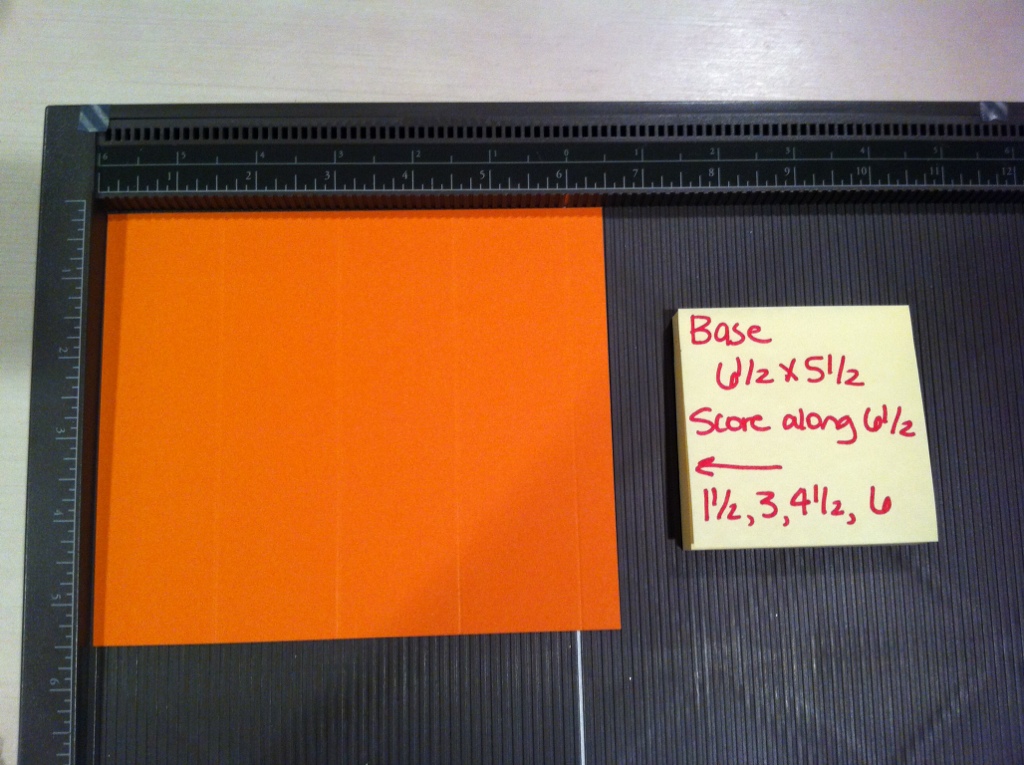
1. Start with a sheet of card stock or DSP that is 6 1/2 x 5 1/2.
2. With the 6 1/2 side parallel to the top, score in 4 places – 1 1/2, 3, 4 1/2, 6.
3. Rotate paper so the 5 1/2 is now at the top.
4. Score in six places – 3/4, 1 1/4, 1 3/4, 3 3/4, 4 1/4, 4 3/4.
(SORRY THE PHOTO IS MISSING HERE)
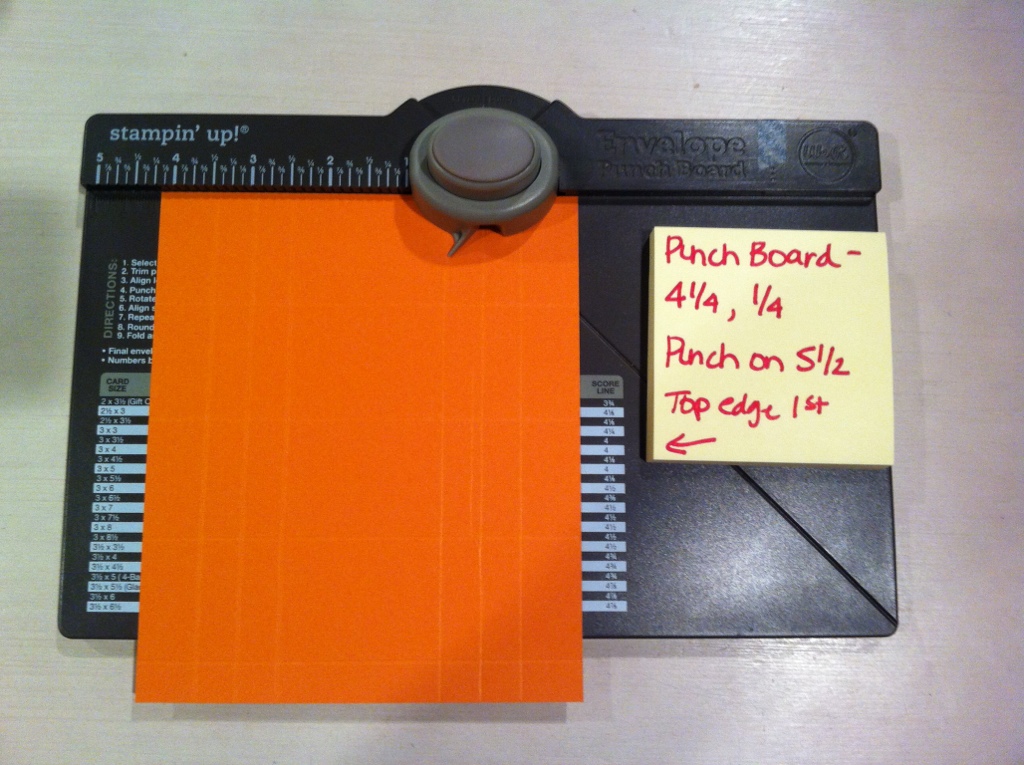
5. Place the 5 1/2 parallel to the top of the Envelope Punch Board. The next parallel score line is at 1 1/2.
6. Punch at 4 1/4.
7. Slide paper to the right to where the left edge lines up with 1/4, punch.
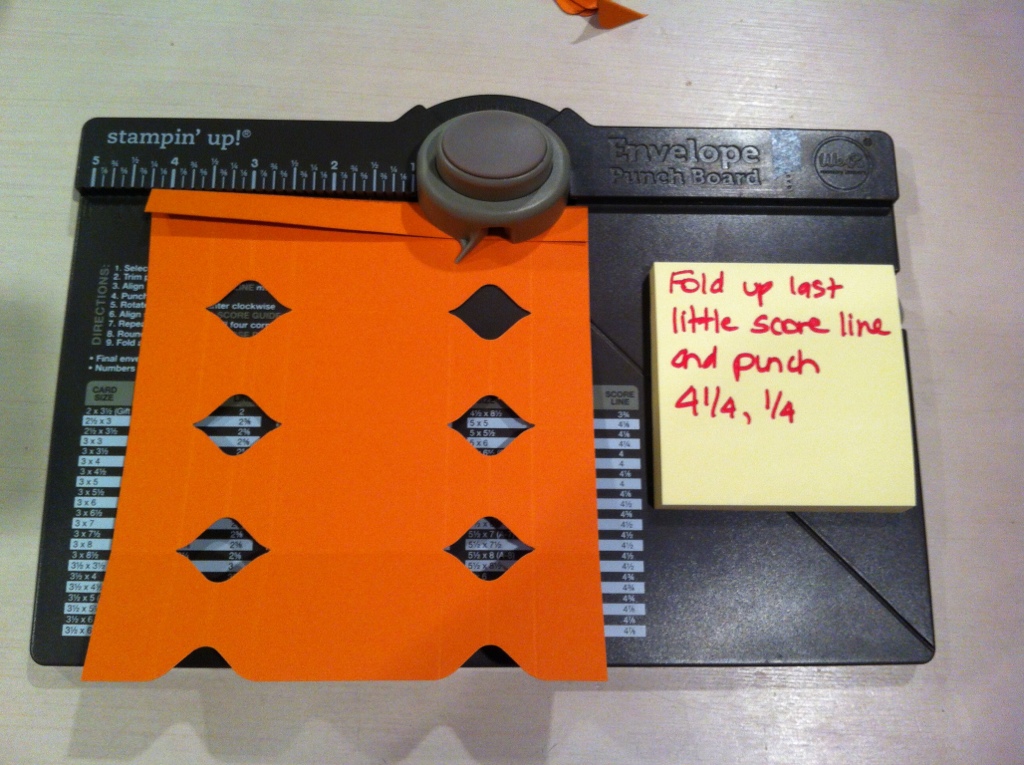
8. Remove paper. Fold paper down to the first score line.
9. Again, line left edge up at 4 1/4, Punch. It is a bit thick and may require a little muscle to punch. You can do it.
10. Slide folded paper to the right to where the left edge lines up with 1/4, punch.
11. Repeat this remove, fold to next score line, punch, slide and punch until you get to then end.
12. At the end, your last score to fold is small, 1/2″. It does work. Fold it and punch, then slide and punch, as you did before.
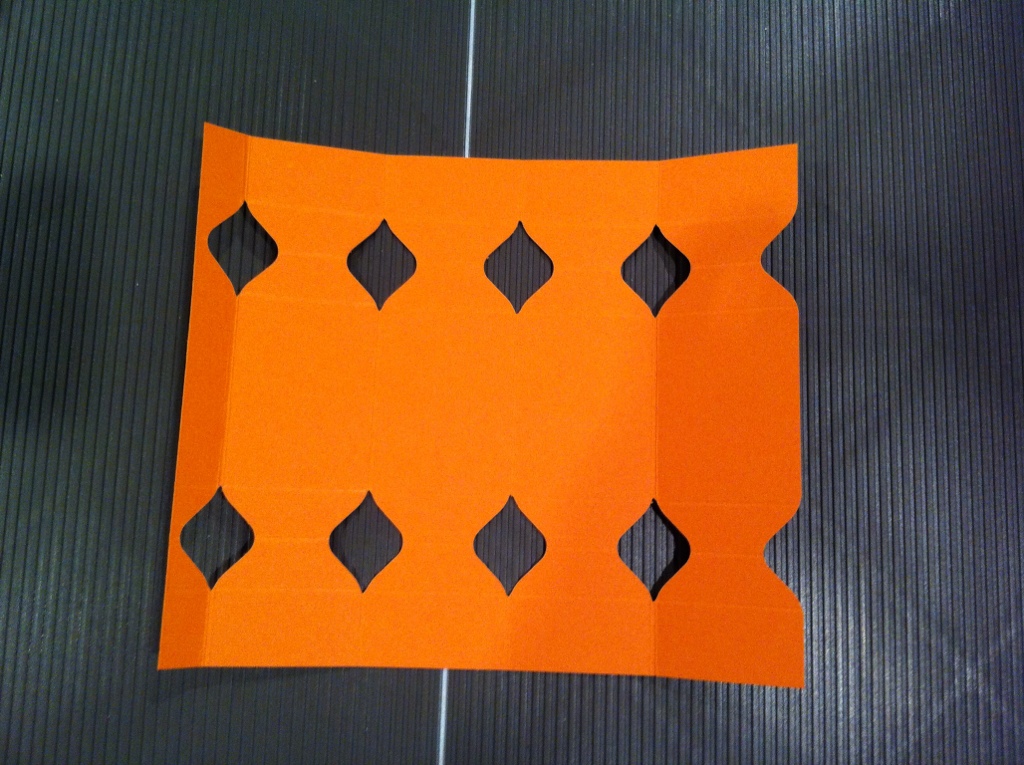
13. You are through punching!
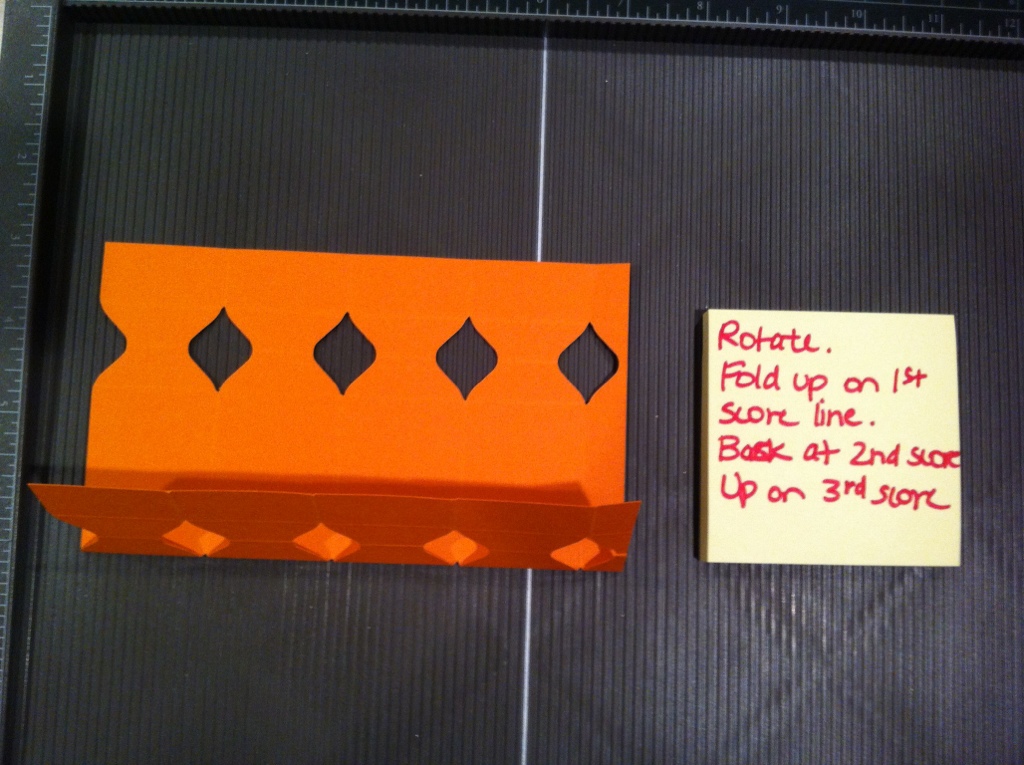
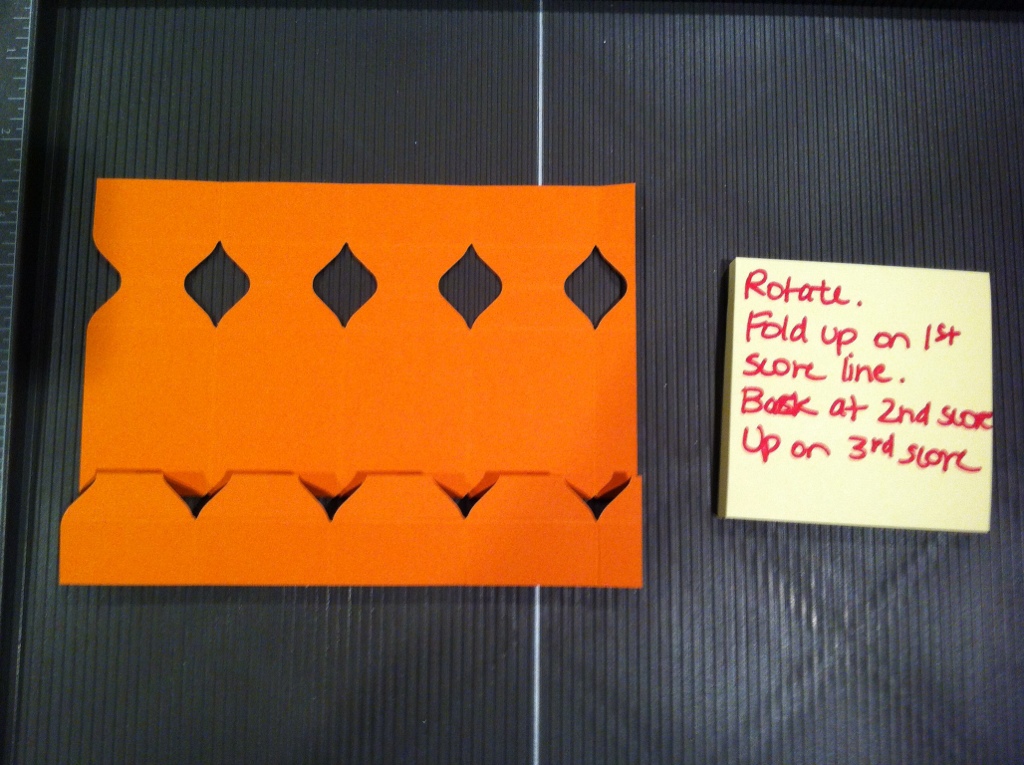
14. Rotate punched paper as shown. (Mine is only on the score board for visibility.)
15. Using the lower set of 3 score lines, the upper most score line, fold up.
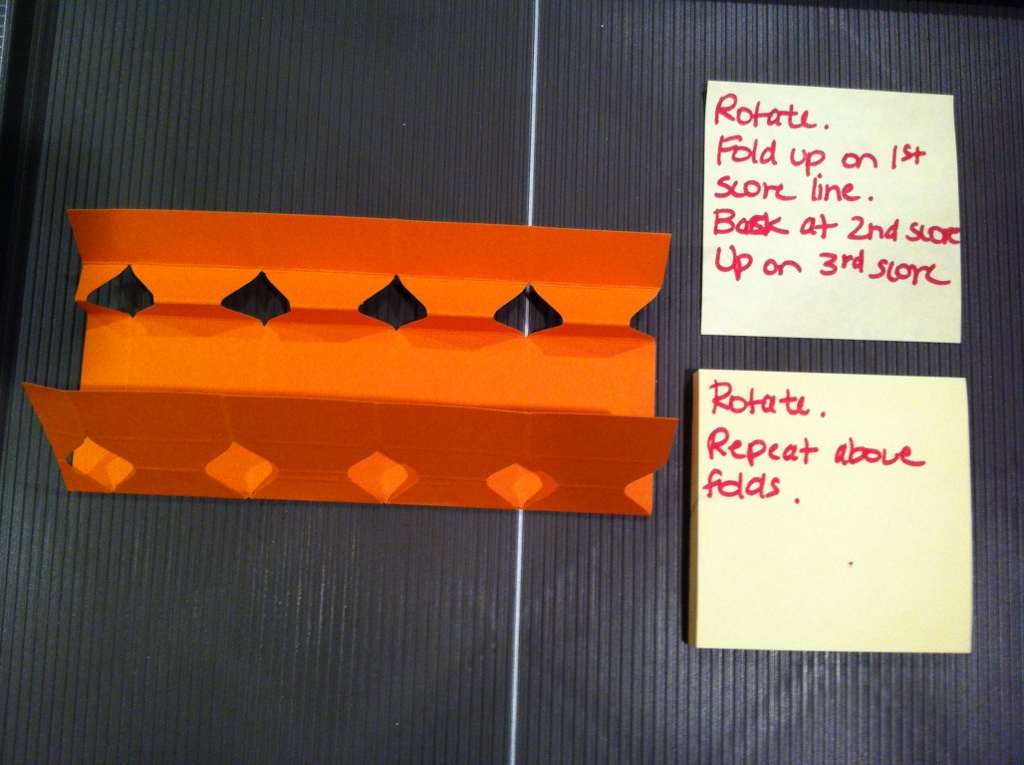
16. The middle score line, fold down, or back.
17. The last score line, fold up. Mine sort of didn’t stay up.
18. Basically, it’s a ‘fan fold’ you just did.
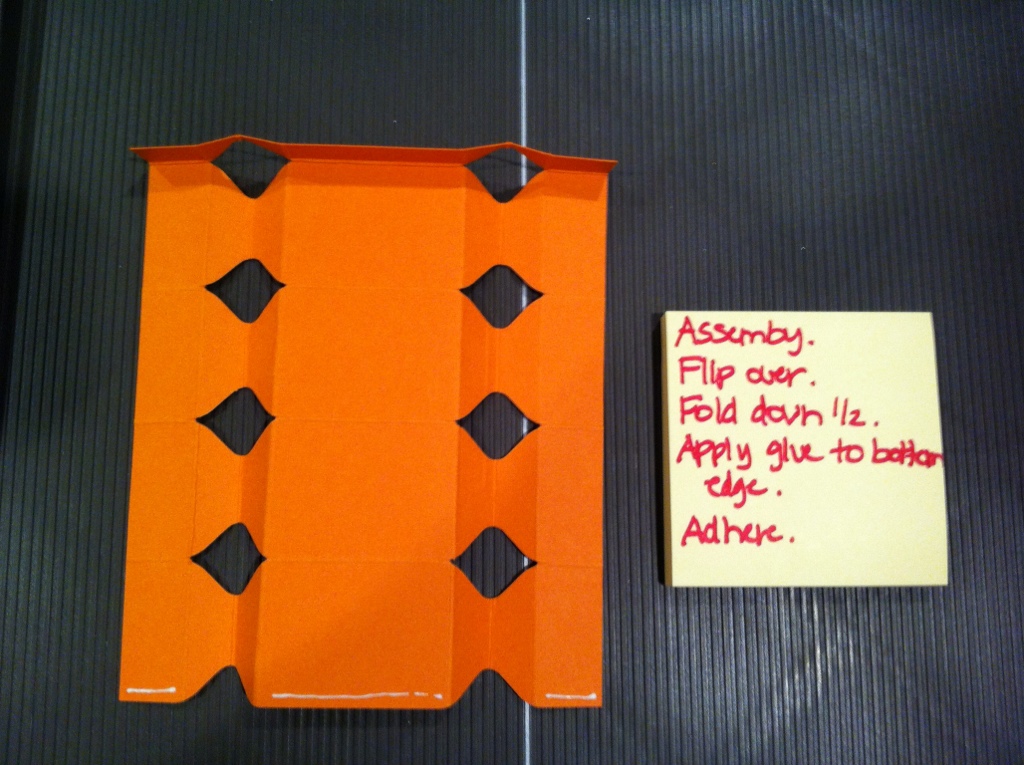
19. Rotate and follow these same steps to create the same ‘fan fold’ on the other side. Or mountain and valley – whatever you call it.
20. At this point, rotate again.
21. Fold all your score lines. The top 1/2″ section is folded down, whereas all the other score lines went up, opposite.
22. Apply glue or Sticky Strip to very edge. SNAIL didn’t work very well here for me. It popped open.
23. Fold up or together to secure along edge.
24. When your glue is set, push in the ends of your cracker, it will come together.
25. Your ‘cracker’ is now finished and ready to fill and decorate!
Now, I did initially follow a tutorial make the basic cracker box. It took me several tries and lots of scrap paper to get to this size that was to my liking. That was the hard part, figuring out proportions.
I hope you have found this pictorial tutorial a treat, and an easy one to recreate! Please let me know if you have any questions!
Footnote. The original post can be found here. The ‘cracker’ was made for a team swap, but my inspiration was from a challenge at Create with Connie and Mary Winter Collection – and I made it into the Top 3!!! Yay me! Thanks, Connie & Mary. I’m so honored!
Happy Creatin’
Libby






Thanks for the tutorial!!!
Thanks for leaving a comment Vicky. Let me know if it works for you or if you have any questions!
A great tutorial, thanks for sharing x
Thanks for stopping by and leaving a comment!